


Have you ever wondered if there’s an easier way to quickly and easily send invoices to your clients in Honeybook? Maybe you’ve been thinking, “I just keep making new invoices and it’s cluttering my account! Is there a better way to do this?” There absolutely is!
In this video, I’m going to walk you through how to send invoices in Honeybook, a client management system, with just a few simple clicks of a button. Invoices are one of the many templates you can build within your own Honeybook account. Many people ask me, “But how do I actually build the invoice or send the Honeybook invoice template?” This video is going to help answer these questions!
The first thing you want to do is go into the “Tools” menu and click on “Templates.” If you haven’t already, make sure you update to the new Smart Files feature for a new and improved template experience. From there, click “Create New” and choose invoice. Now, you can choose from a variety of Smart File templates already built in Honeybook or create a custom template for your business.
Next, you’ll start adding in your blocks. You can add or delete any blocks of content or elements that you’d like with Smart Files. So, in my video, I deleted the box with my company information and then added in the invoice block. I like to put my logo at the top, too, just to give it a more polished and professional look.
Pro Tip!
When you are ready to add in your packages, make sure you’ve uploaded your package templates into Honeybook prior. This will make choosing what services to include on the invoice a breeze!
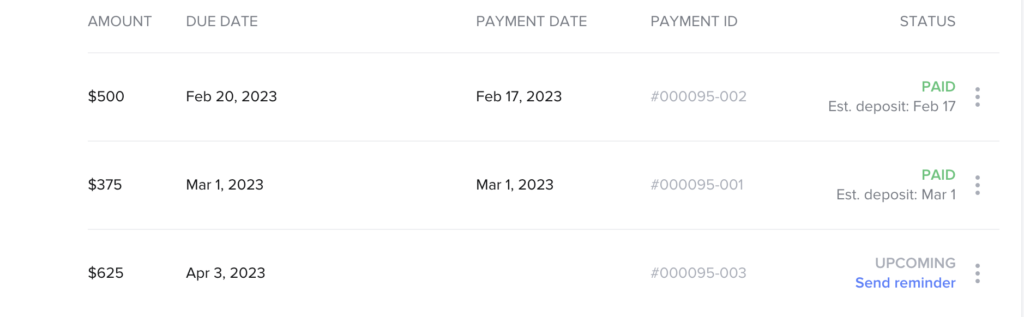
Once you’ve added in your services, simply click from the list of your templates which package you’d like to have on the invoice. After you’ve done that, you can structure out a payment schedule if you like. The beauty of the payment plans in Honeybook is that they can be completely customizable. You can add Smart Dates, custom dates, and more!
Finally, once your invoice is built and ready to go, check the payment page and make sure the settings are as you want them. You can adjust to the payment methods you use, if you want to give the option for a tip, and more. Lastly, always take a peek at your Smart File settings. Apply your Company Theme so everything is consistent with your brand.
There it is! Now, when you’re ready to send an invoice, you’ll have a quick and easy template you can access in your client projects and send out as part of your booking process with just a few clicks. And this will in turn give you back so much time and help you keep your Honeybook more organized. Have you ever used invoice templates for your own business? If so, what was your experience like? I’d love to hear in the comments below!


+ view comments . . .